Manage Smart Treasury
The Smart Treasury feature automates liquidity top-ups based on configurable thresholds and AI-powered forecasts derived from your treasury's historical data. This helps ensure your Layer1 Wallet always maintains sufficient balance to support trading and withdrawals — even during periods of volatility or high activity.
Roles: In order to use Smart Treasury your user must have the role treasury:admin. You can check and assign roles in Manage account > Team members.
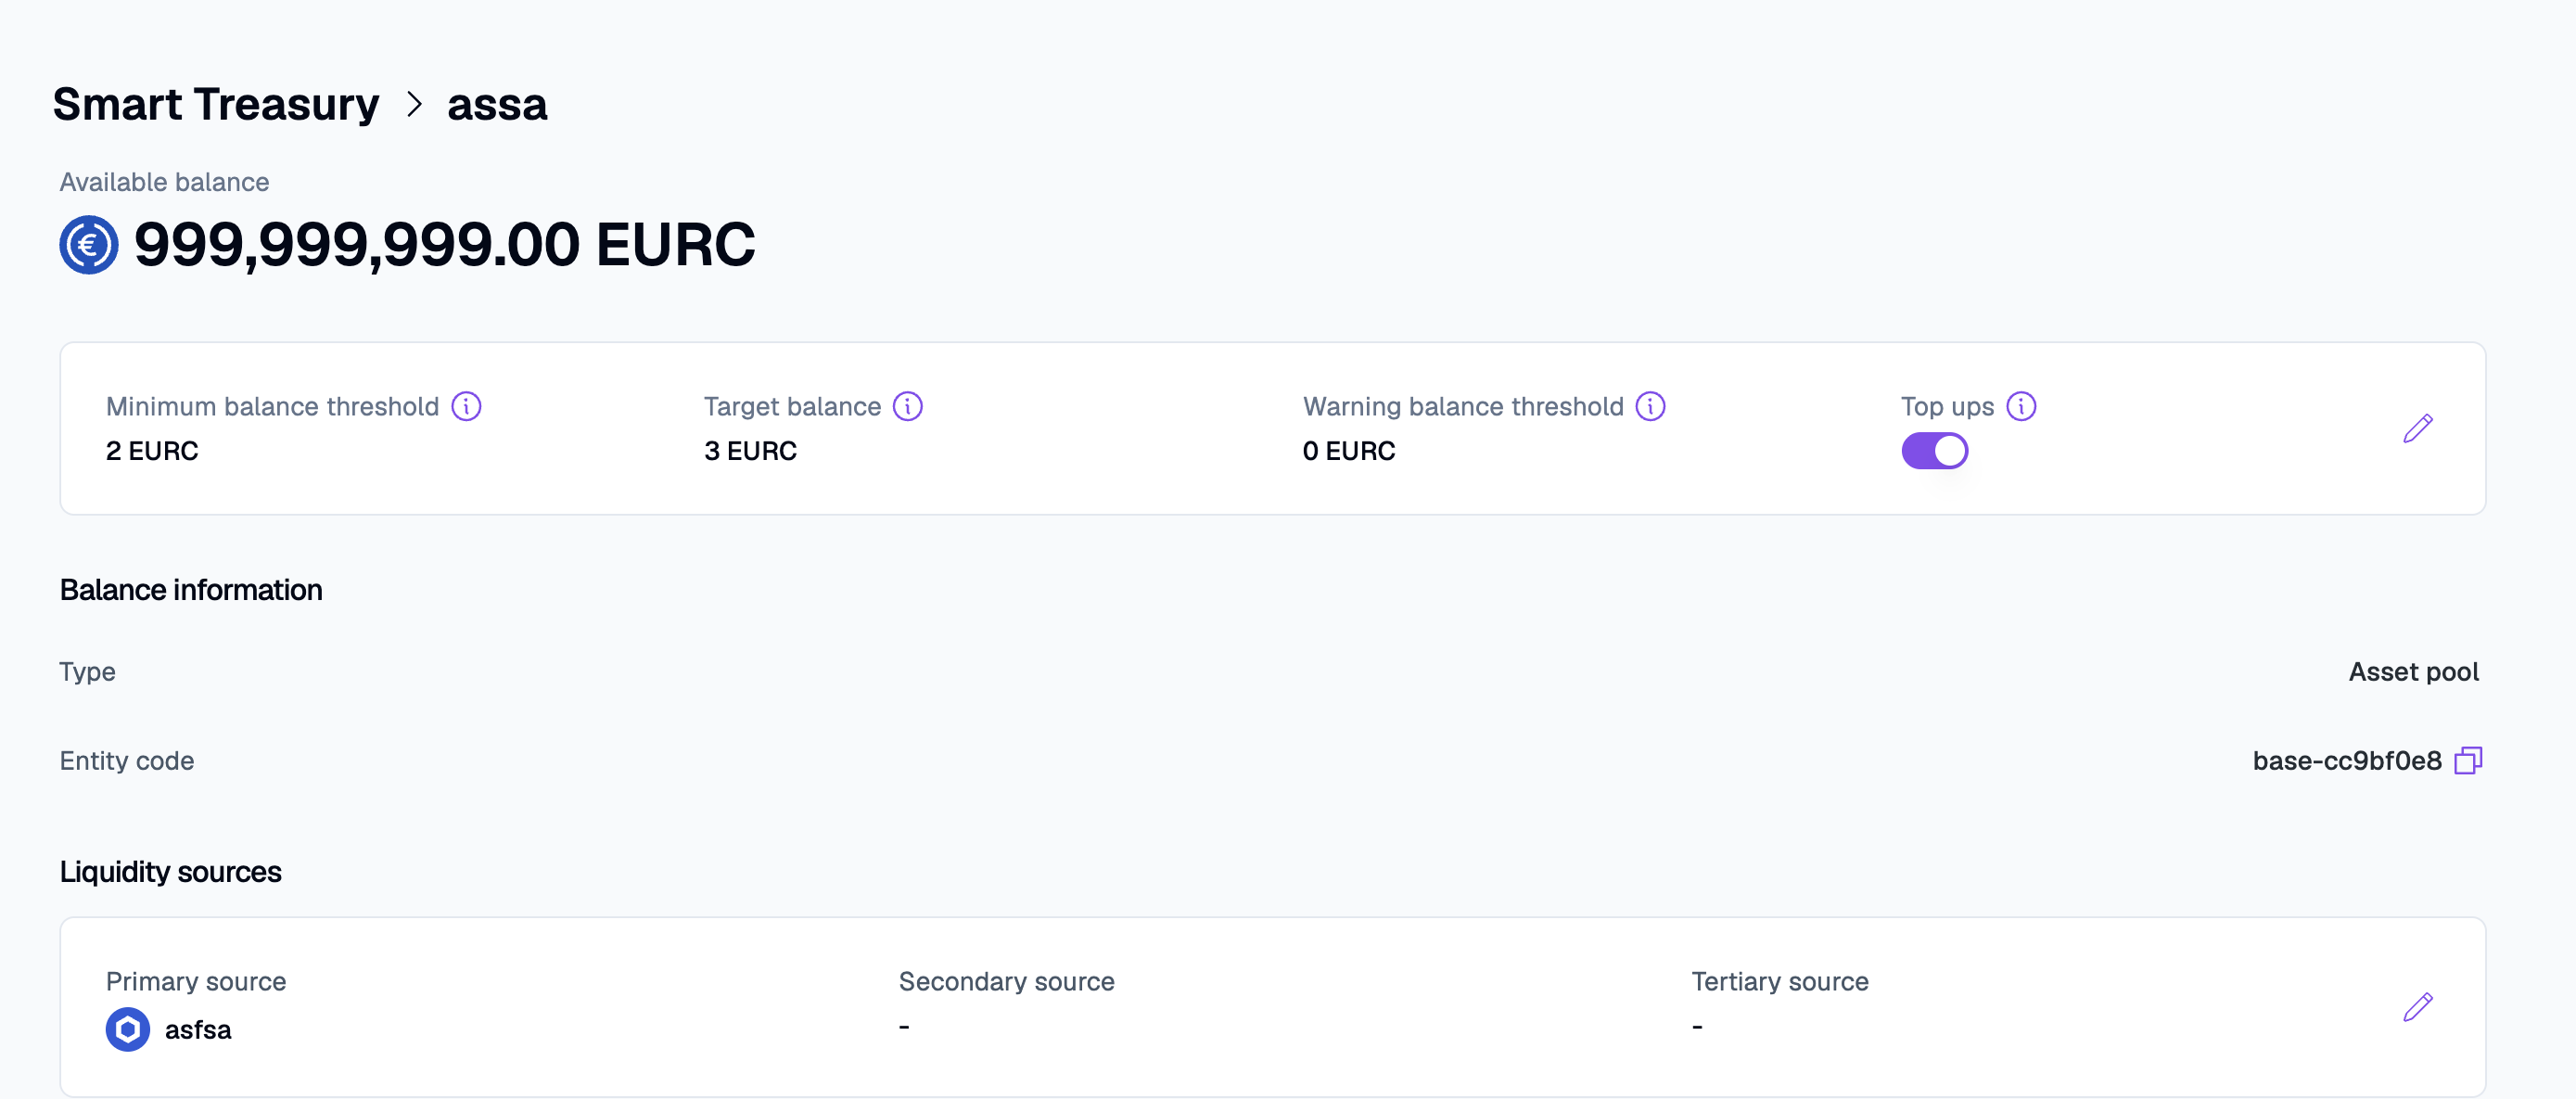
Use the managed balance page to view top-ups and movements for a managed balance. To open it, go to Smart treasury and, on the Balances tab, click the managed balance you want to view. The page shows the available balance and the following sections:
- Balance thresholds: the Minimum balance threshold, Target balance, and Warning balance threshold. To change them or the balance name, click the edit icon. In Edit managed balance, update the values and click Save.
- Top ups: turn the toggle off to stop Smart Treasury from creating top-ups for this balance, and on to resume them. When you link a liquidity source to a managed balance, top-ups are enabled automatically.
- Balance information: the balance type and entity code, and for partner account balances, the partner account alias.
- Liquidity sources: the Primary source, Secondary source, and Tertiary source that fund top-ups. To change them, click the edit icon. The Select liquidity sources window opens. See Add liquidity sources to a managed balance.
- Balance history (Last 8 Hours): a chart of the balance over the last eight hours, including withdrawals and top-up events. This chart is in beta.
- Liquidity Movements: the top-ups that Smart Treasury initiated for this balance, with their source, destination, amount, and status.
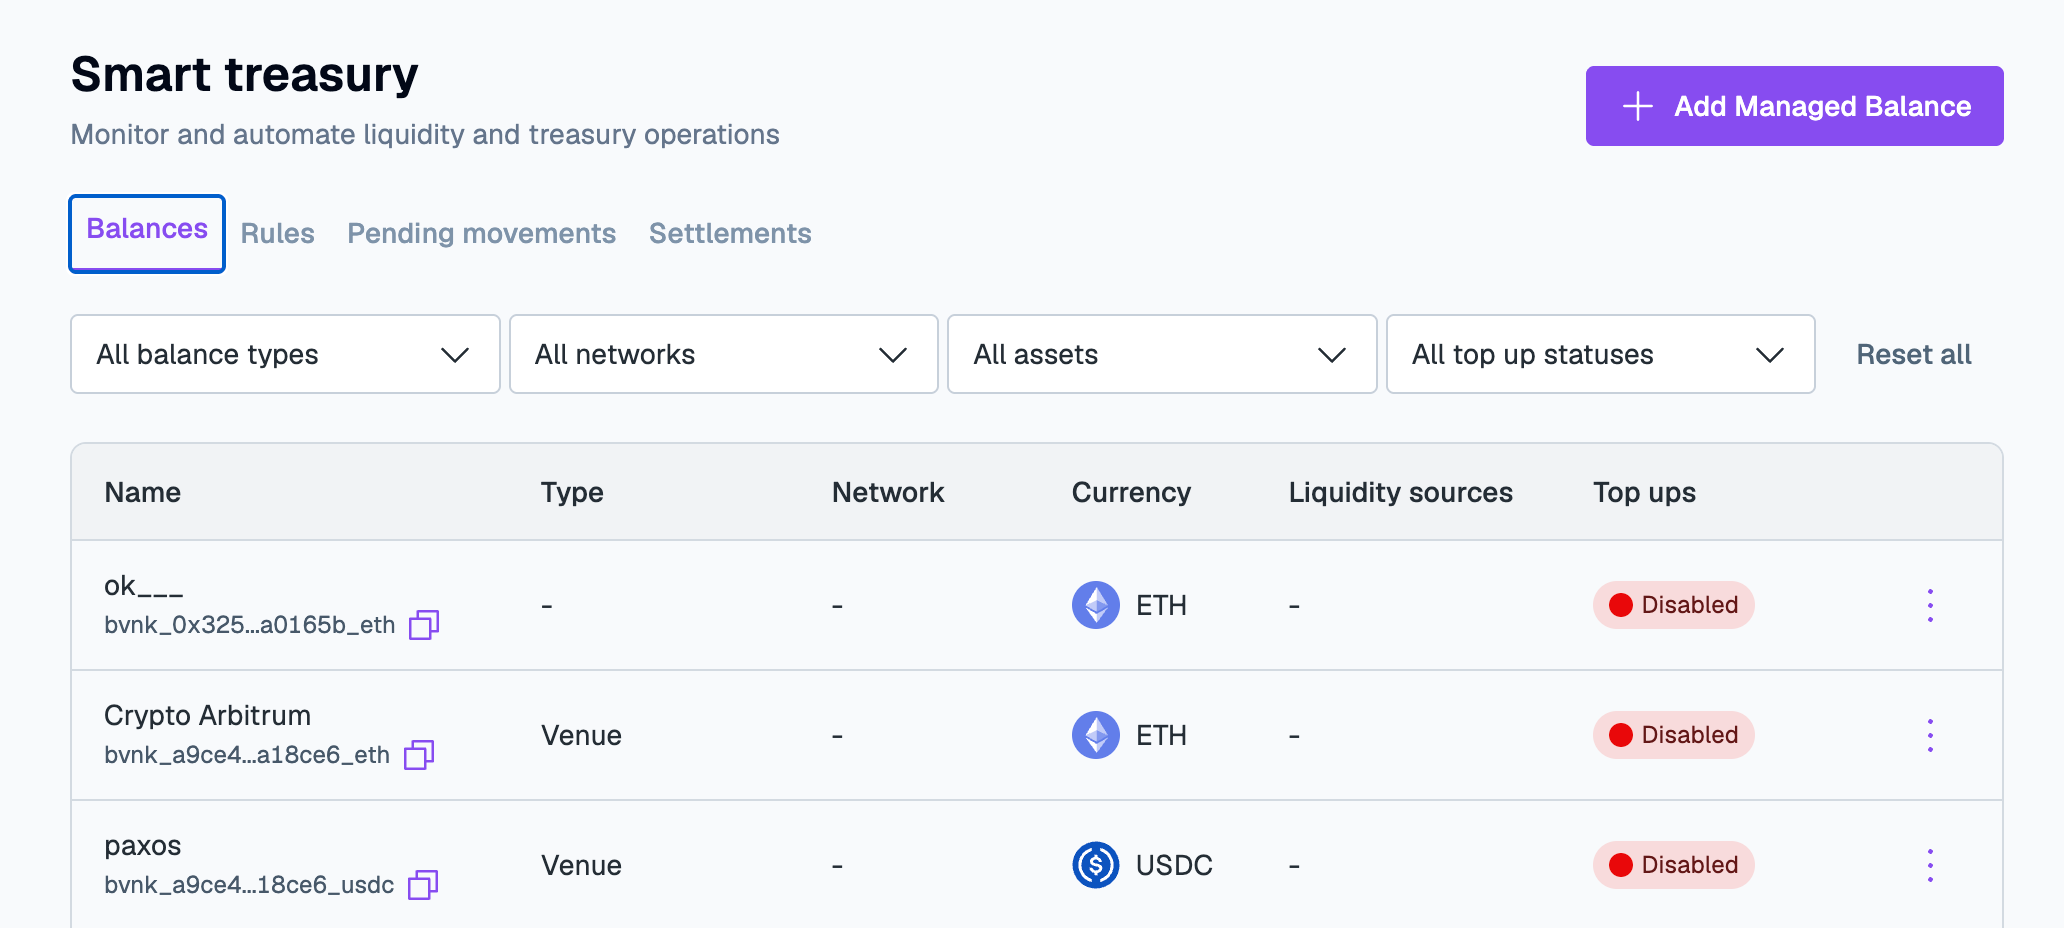
You can also manage liquidity sources from the Balances tab. Open the menu (⋮) next to a managed balance and click Add liquidity sources, or Edit liquidity sources if sources are already linked. To remove a managed balance, click Delete in the same menu.
Add a managed balance
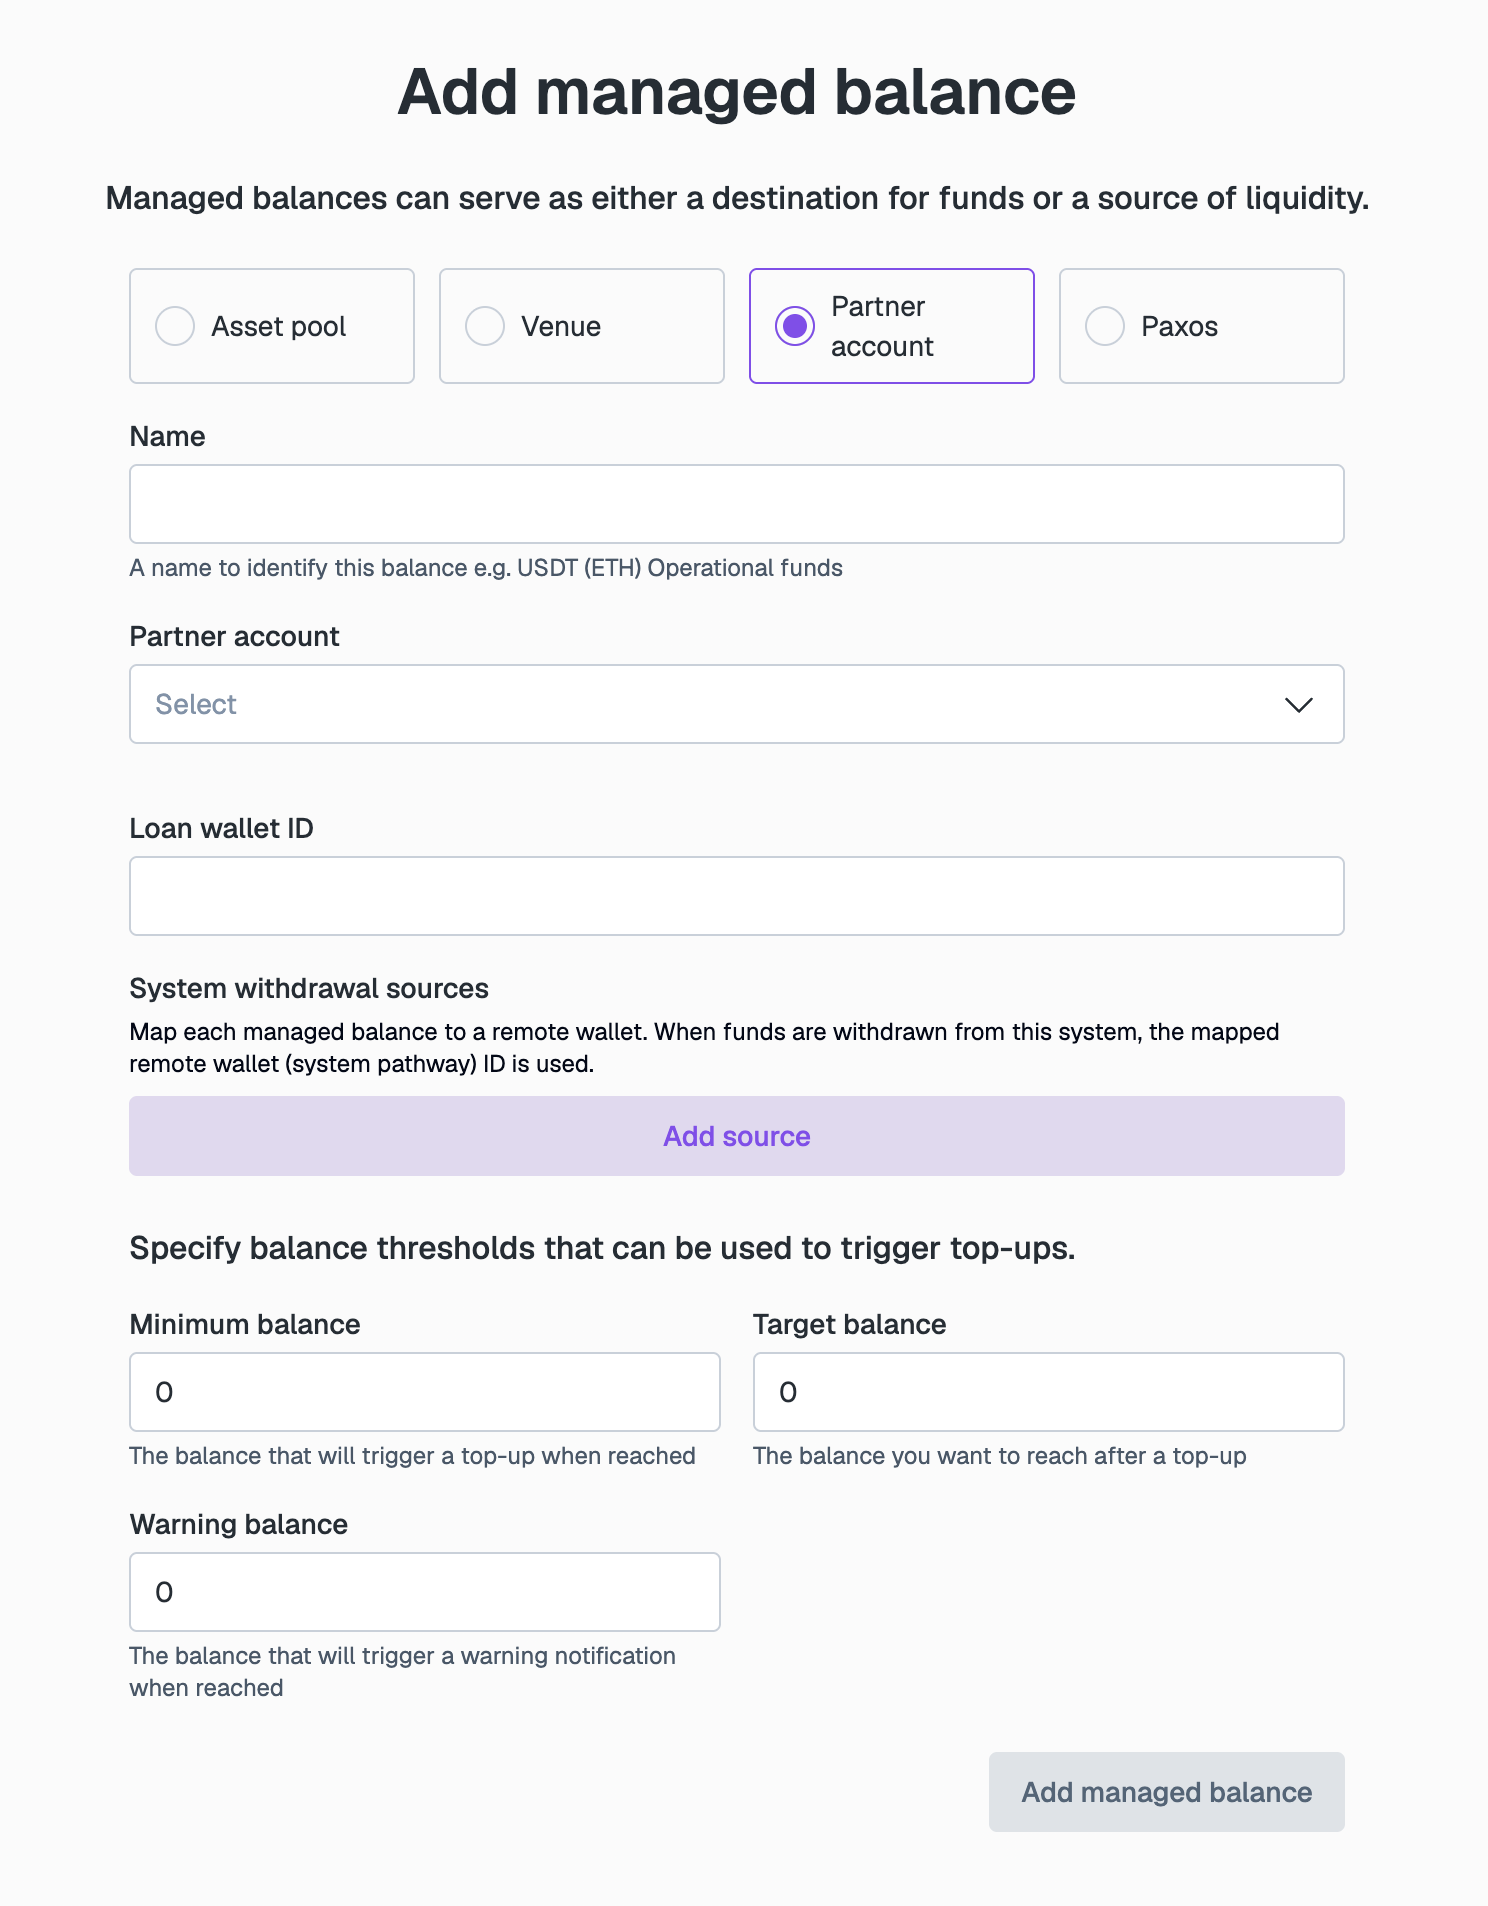
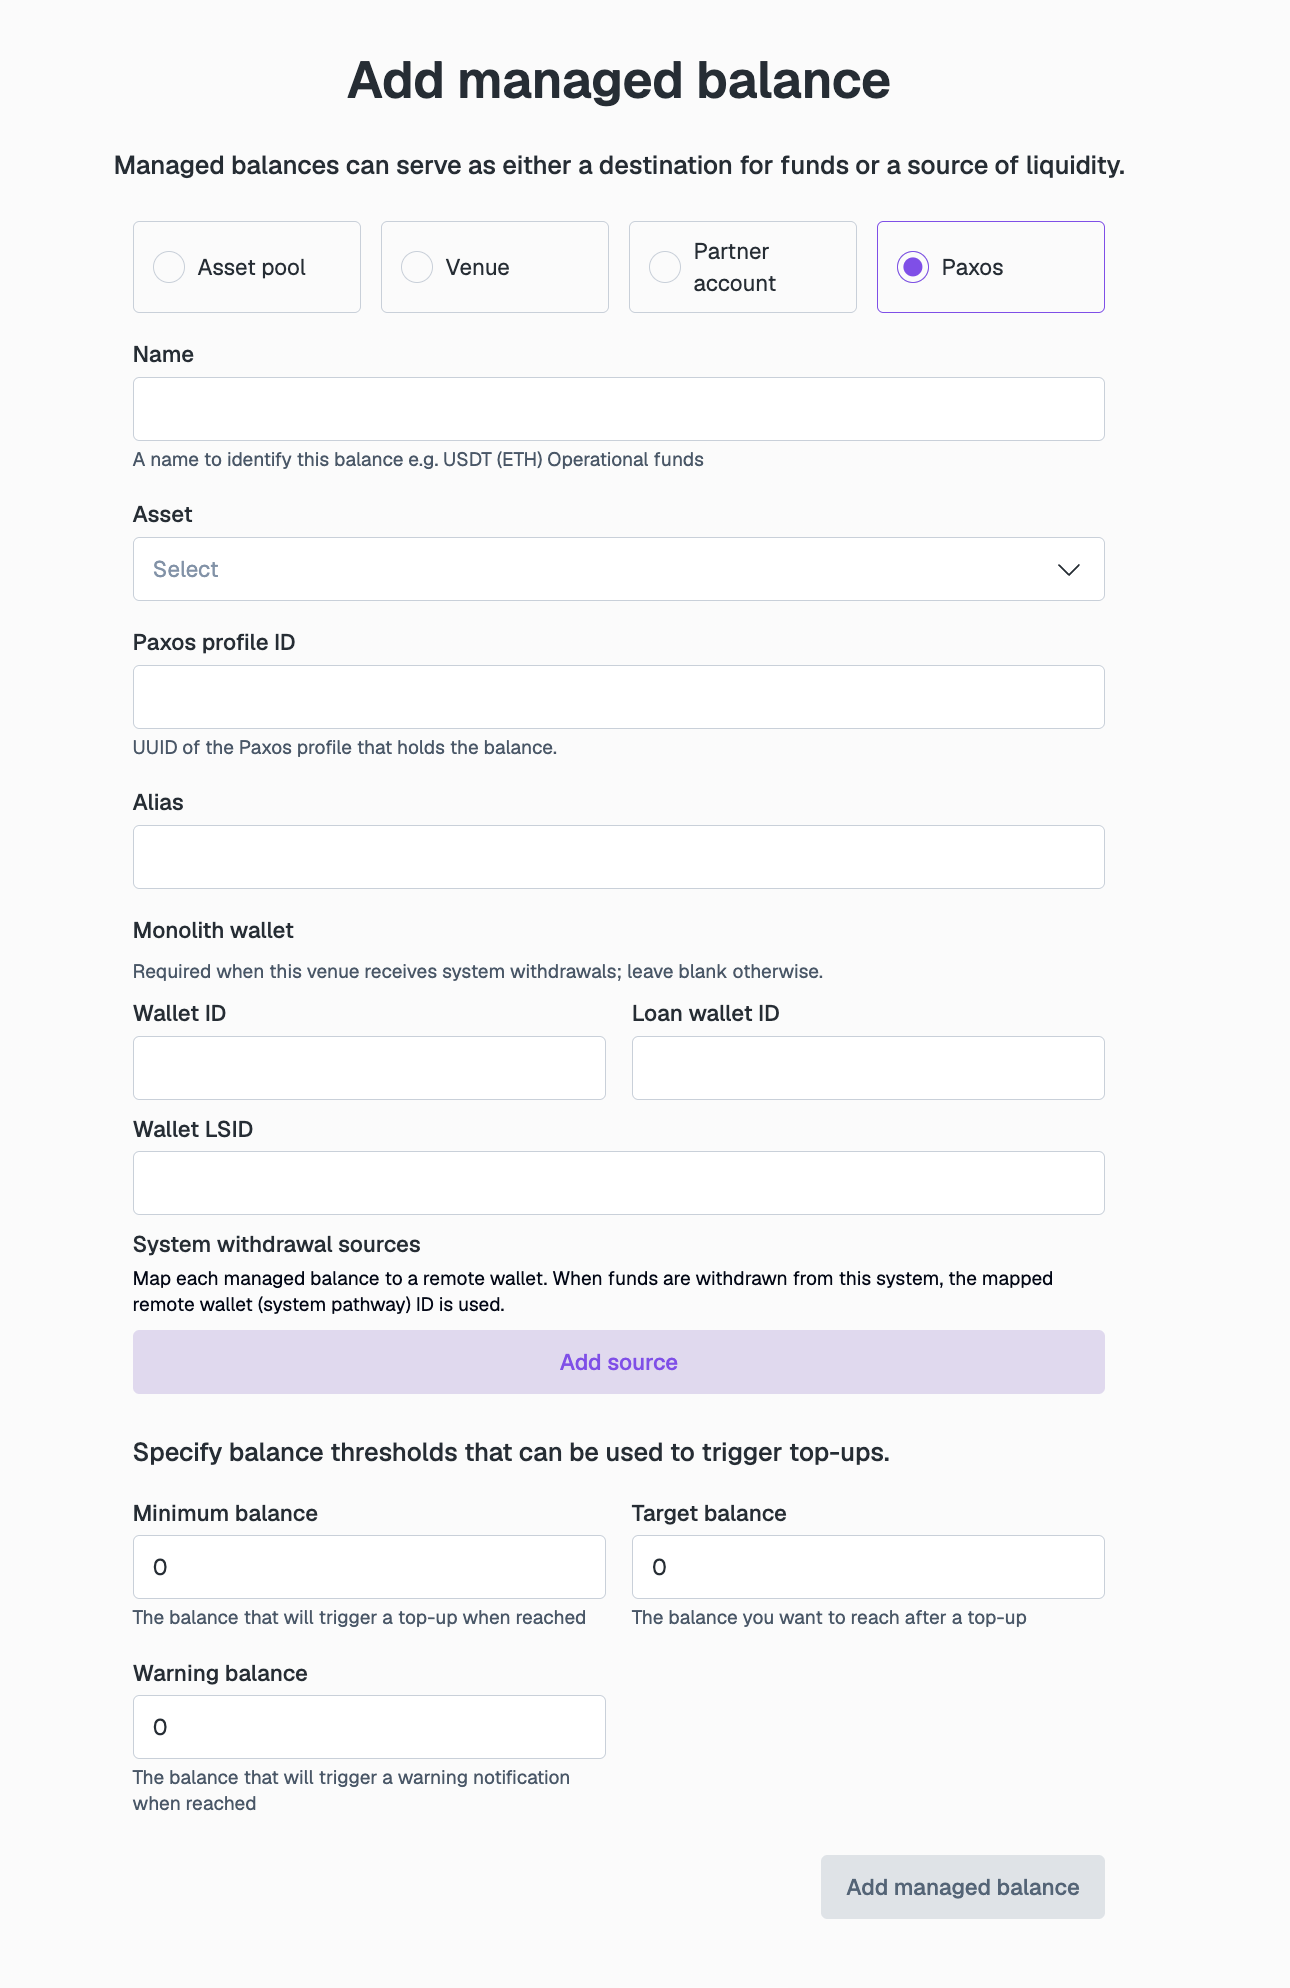
Managed balances can serve as either a destination for funds or a source of liquidity.
To add a managed balance, do the following:
-
On the Layer1 Portal, go to Smart treasury and click + Add Managed Balance.
-
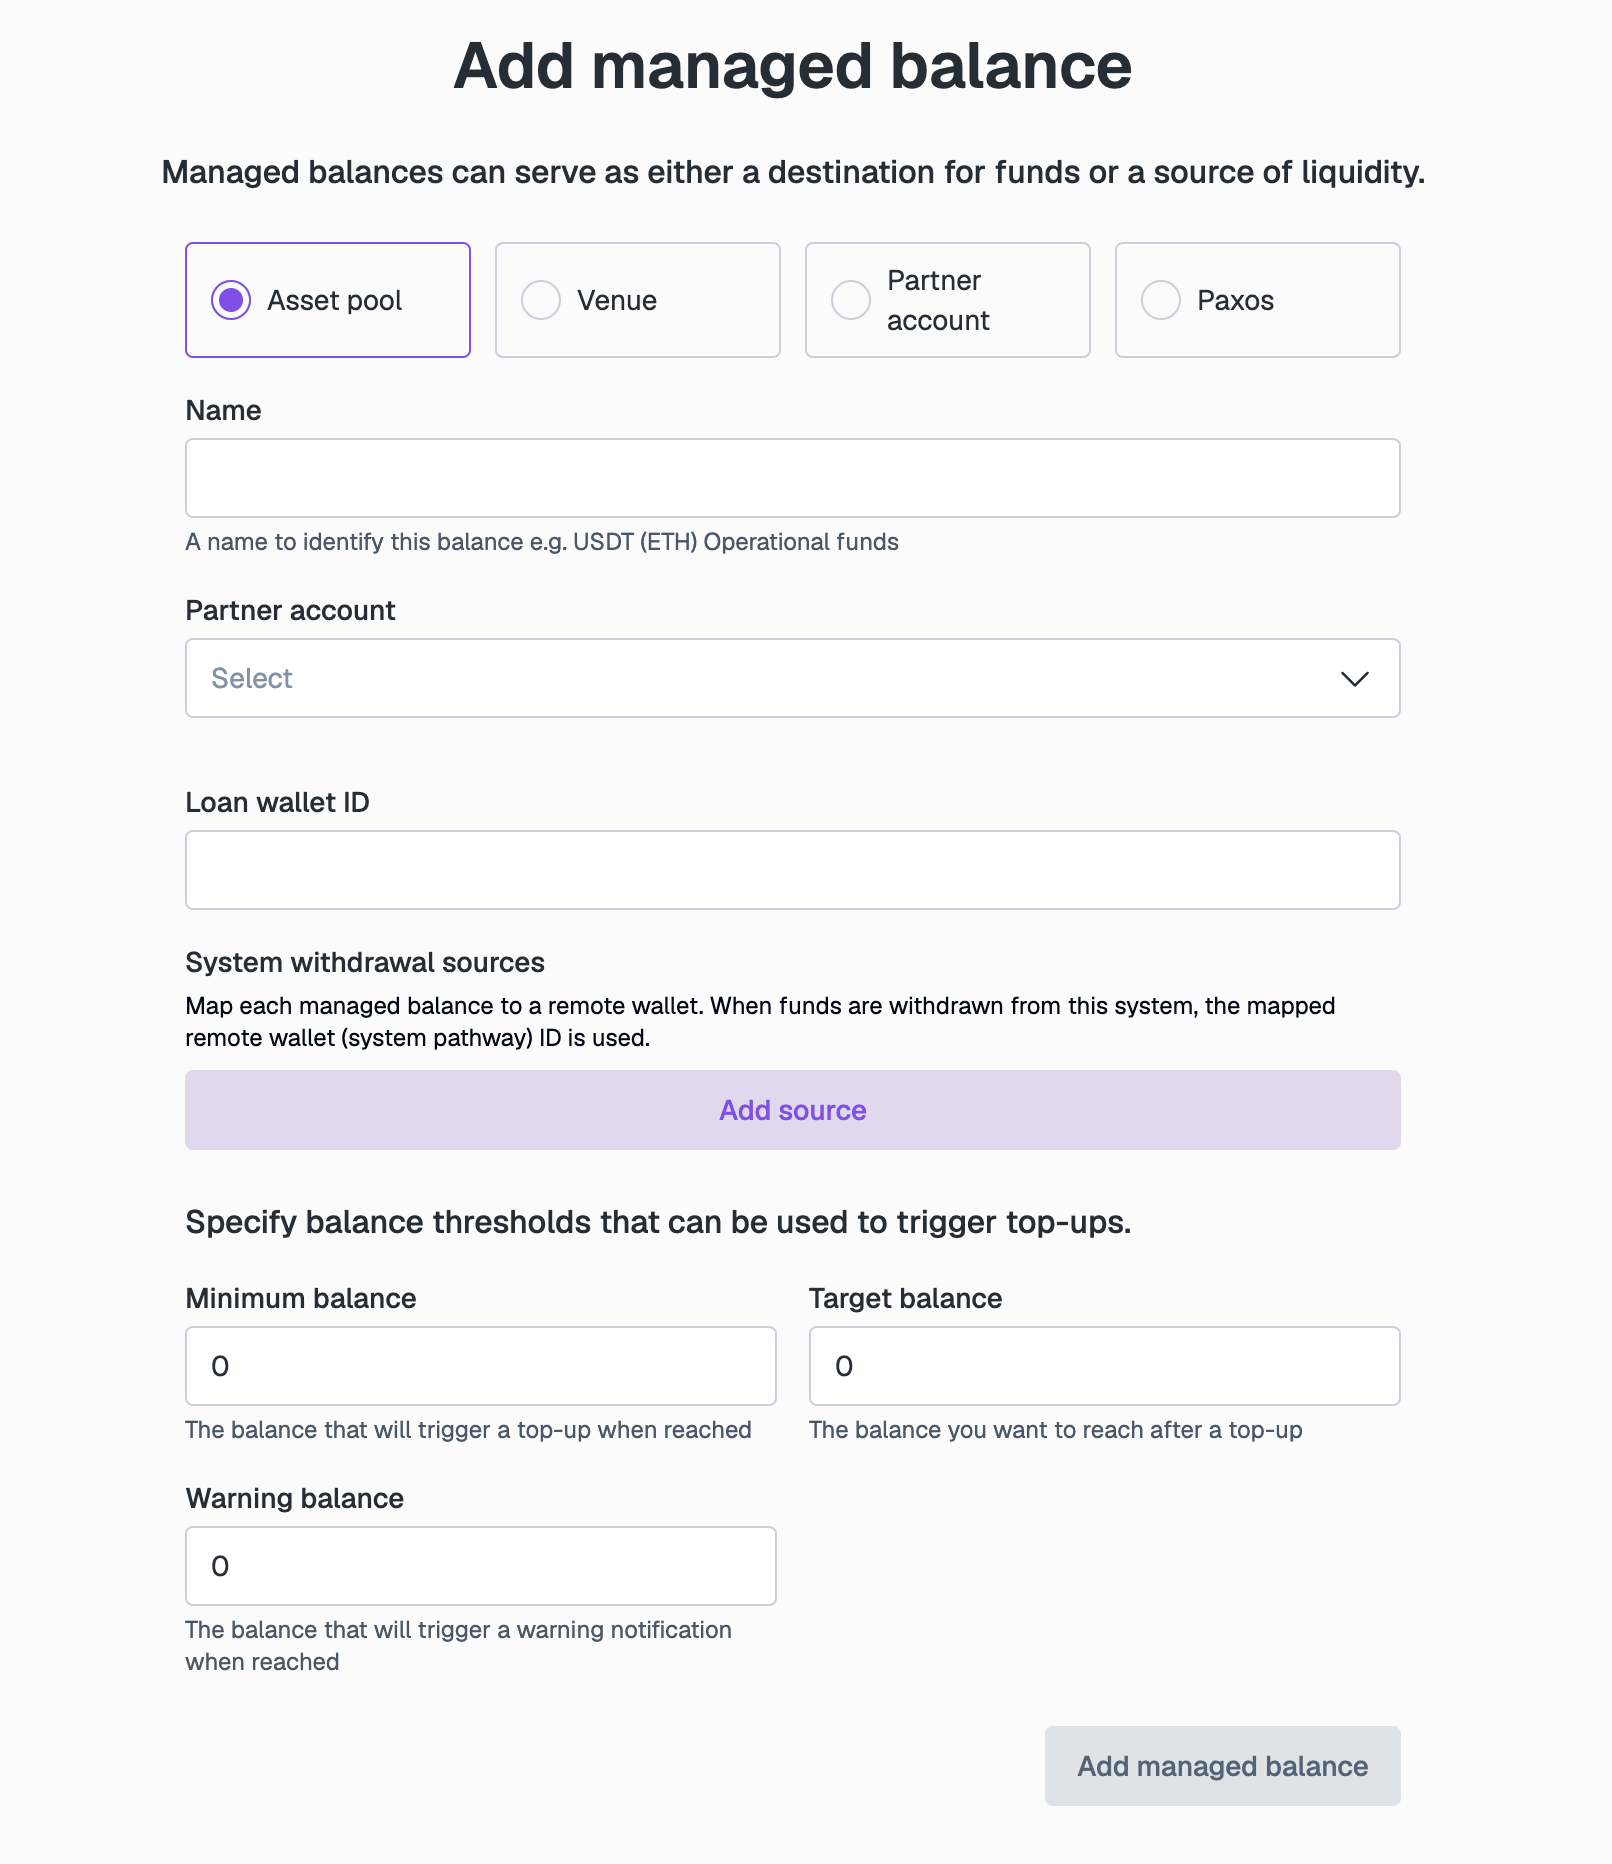
Select the balance type:
- Asset pool: a balance within your Layer1 Wallet
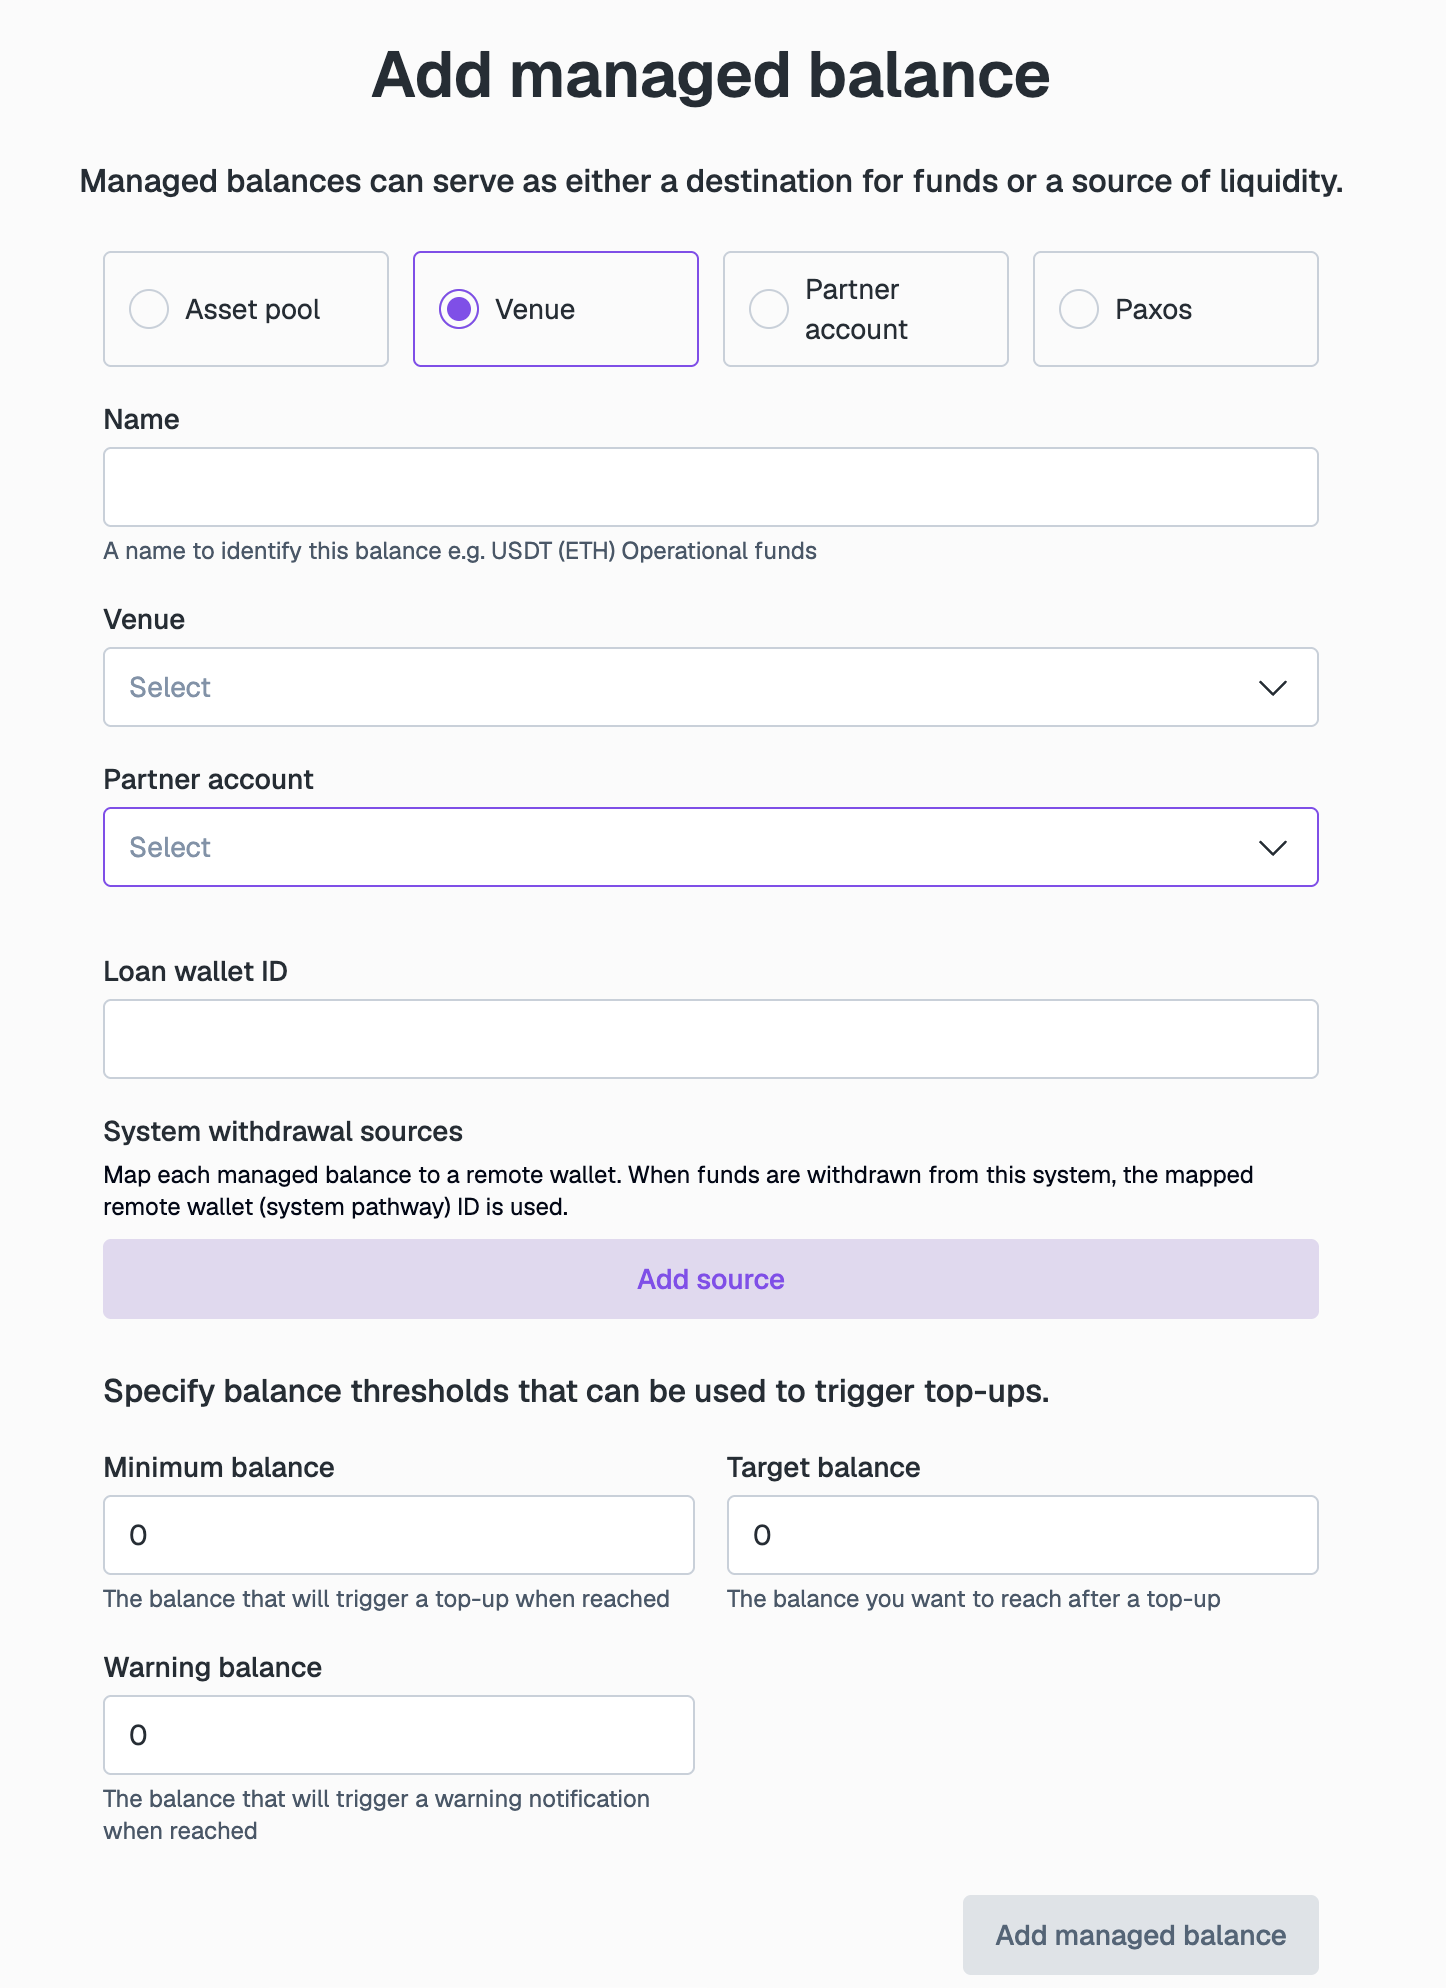
- Venue: a balance at a trading venue
- Partner account: a balance in a BVNK partner account. Available only if BVNK-integrated treasury is enabled for your tenant.
- Paxos: a balance held in a Paxos profile. Available only if Paxos venues are enabled for your tenant.
-
In Name, enter a name to identify the balance, for example
USDT (ETH) Operational funds. -
Complete the fields for the selected balance type:
- Asset pool
- Venue
- Partner account
- Paxos
- Asset pool: Select the existing asset pool.
- Network: Select the required crypto network.
- Asset: Select the cryptocurrency you want to use.
- Alias: Optional. A human-readable label used in venue withdrawals.
If the balance is unavailable for your selection, the form asks you to select a different asset, network, or asset pool.
If BVNK-integrated treasury is enabled for your tenant, the form shows Partner account, Loan wallet ID, and System withdrawal sources instead. See BVNK wallet fields.
-
Specify the balance thresholds that trigger top-ups:
- Minimum balance: The balance that triggers a top-up when reached.
- Target balance: The balance you want to reach after a top-up.
- Warning balance: The balance that triggers a warning notification when reached.
-
Click Add managed balance. Your managed balance appears in the table.
BVNK wallet fields
These fields appear for Partner account and Paxos balances, and for Asset pool and Venue balances when BVNK-integrated treasury is enabled for your tenant. They link the managed balance to a wallet on the BVNK platform:
- Partner account: The BVNK partner account whose wallet holds the balance. Selecting it fills in the wallet details for you.
- Wallet ID: The numeric ID of the BVNK wallet. It must be greater than zero.
- Loan wallet ID: Optional. The numeric ID of the loan wallet associated with the BVNK wallet, if there is one.
- Wallet LSID: Optional. The ledger identifier of the BVNK wallet, for example
acc:22101919109000:wYzI5:0. - System withdrawal sources: Optional. Maps each managed balance to a remote wallet. When funds are withdrawn from this system, the mapped remote wallet (system pathway) ID is used. Click Add source, then select the Managed balance and enter the numeric Remote wallet ID.
Add liquidity sources to a managed balance
Once you have created a managed balance, select the liquidity sources that fund its top-ups when the balance drops below the minimum.
To select liquidity sources, do the following:
-
On the table row item to which you want to link a liquidity source, click Add liquidity sources. The Select liquidity sources window opens.
-
In Primary source, select the managed balance that should fund top-ups first.
-
Optionally, in Secondary source, select a fallback. If your primary source cannot be used, funds are pulled from your secondary source so that your top-up rule still executes. To add a further fallback, such as a tertiary source, click the + icon; to remove one, click the trash icon.
-
If the balance you need isn't in the list, click Add a managed balance to create it as a source.
-
Click Confirm.
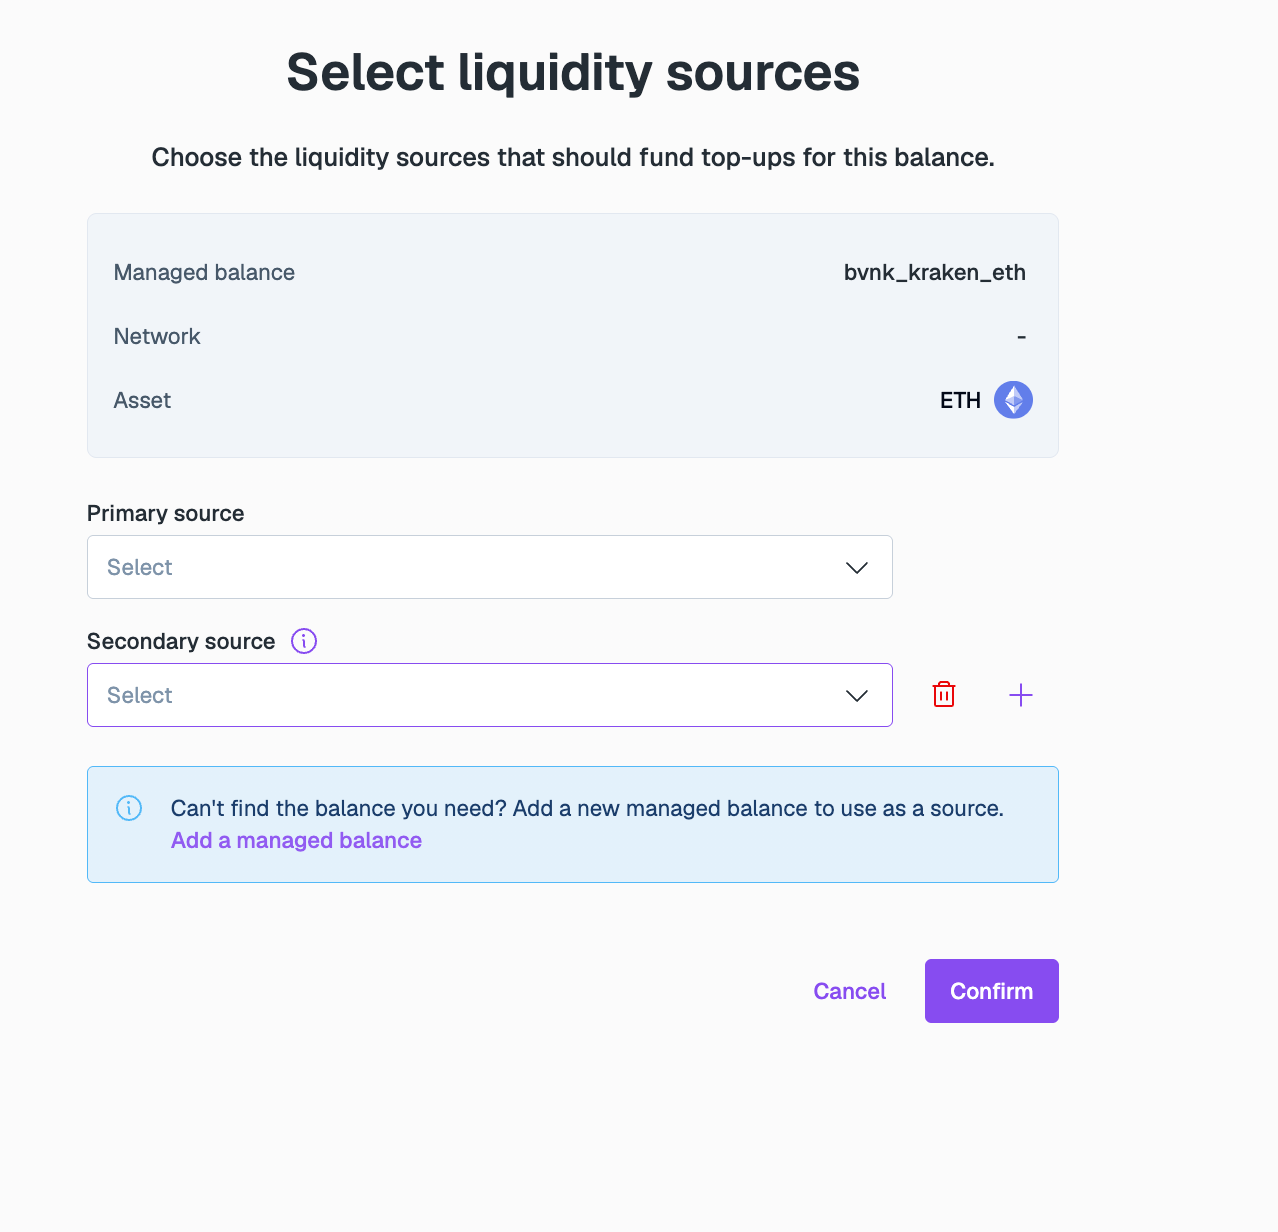
When you link a source to a managed balance, the source will become enabled for top-ups and marked with a green tag in the Smart Treasury table.