Create a stablecoin
Early access
Stablecoin issuance is in early access. It's a paid module and is available on request. Contact your Account Manager to get access.
To create a stablecoin, contact your Account Manager. Together, you will set up the stablecoin and agree on:
- The name and the ticker of the stablecoin.
- The networks it runs on.
- The asset that backs it, who holds the reserve, and how you confirm the reserve before a mint.
- Whether your compliance team can seize the funds of a frozen address.
- Who in your team can mint, burn, approve, and run compliance actions.
Check your stablecoin
When your stablecoin is live, its status is ACTIVE, and you can start minting.
- Portal
- API
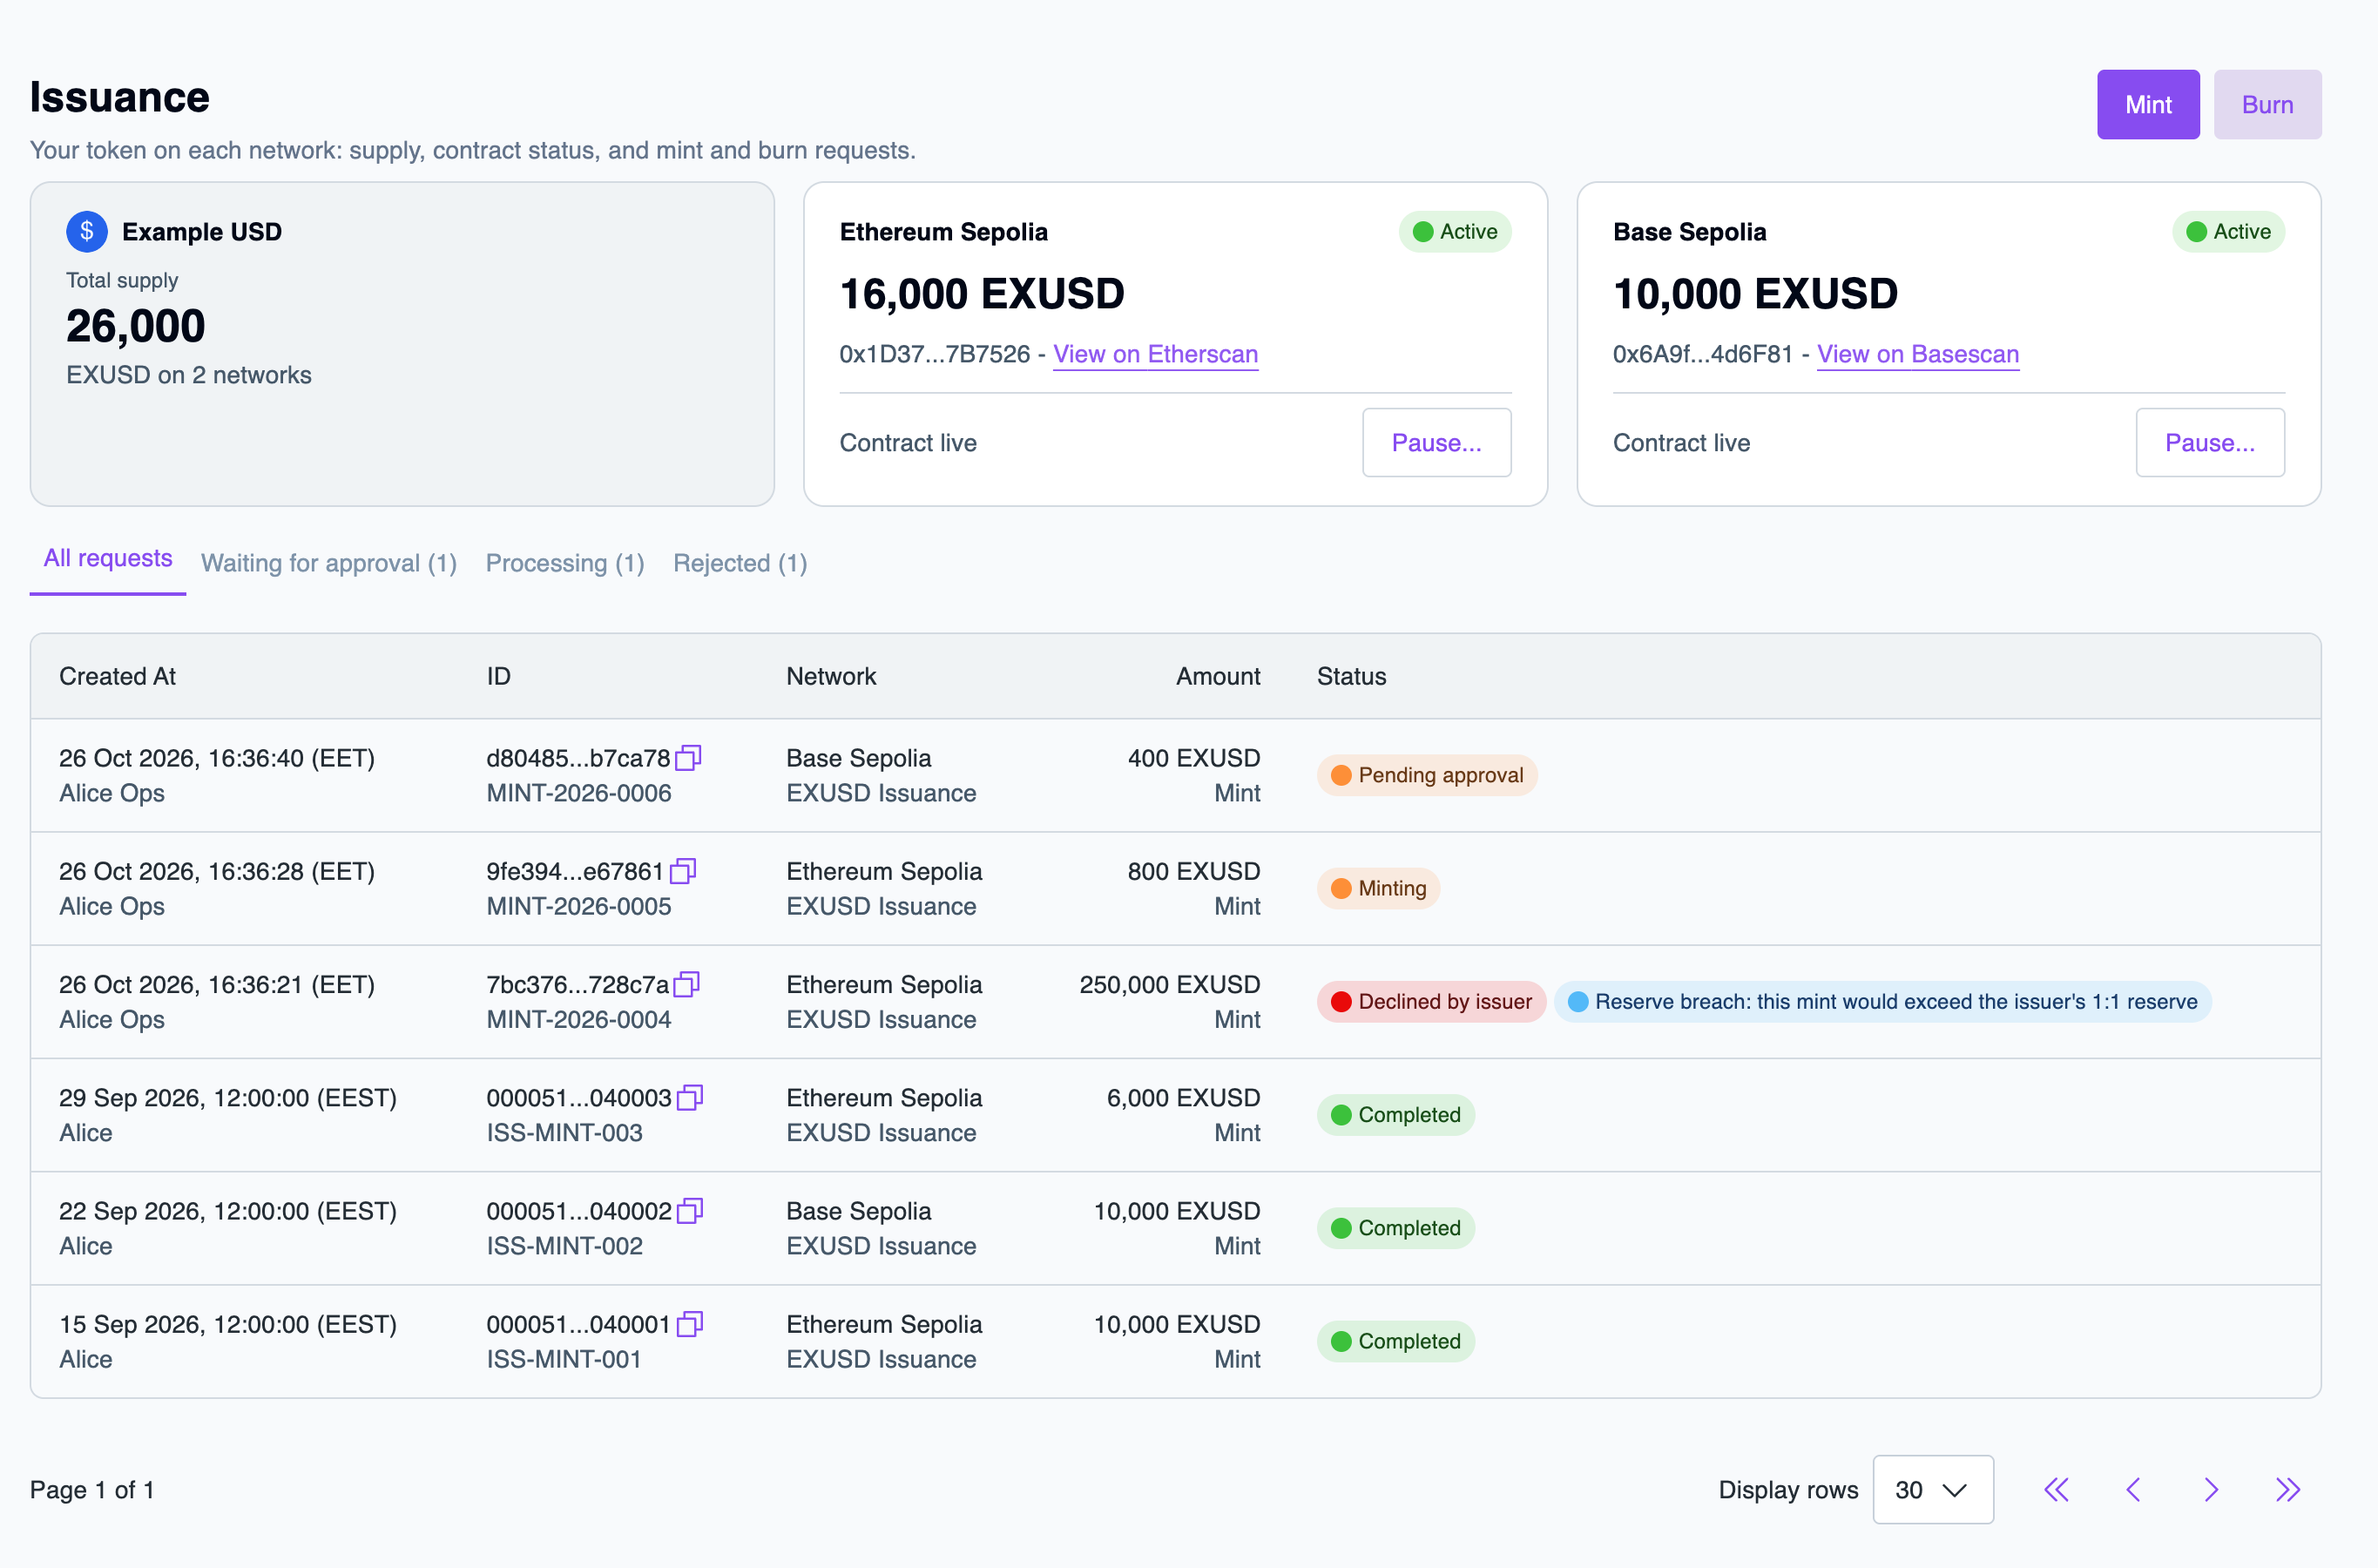
In the Layer1 Portal, go to Issuance > Issuance. You'll see the total supply of your stablecoin and one tile per network showing the contract address, supply, and contract status.
Prepare your team
Before your team begins minting, complete the following steps:
- Assign the issuance roles in Manage account > Team members:
issuance:operatorto users who mint, burn, and run compliance actions, andissuance:viewerto users who only need to see your stablecoin. For an API key, assign the roles in Integrations > API Keys. For more information, see Roles and permissions and Stablecoin issuance scopes. - Set up the approval rules for mints and burns. See Approvals for stablecoin issuance.
- Set up a webhook destination for
layer1:issuance:order:reserve-checkandlayer1:issuance:order:status-changed, and build your reserve confirmation. Every mint waits until you confirm the reserve. See Confirm the reserve.